
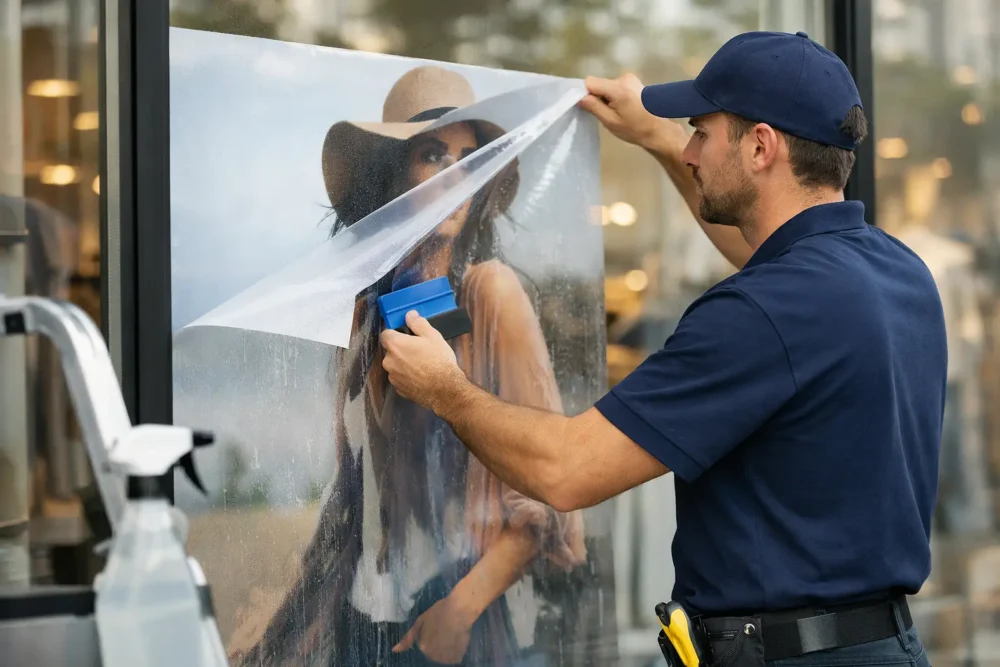
A window graphic can turn unused glass into a hard-working sales tool, but a rushed installation can create bubbles, damaged film, cracked glass, or a safety problem for staff and customers. Knowing how to install window graphics safely starts with respecting the material, the glass, and the work area. Whether you are promoting a grand opening, displaying hours, or adding privacy to an office front, the goal is a clean finish that holds up.
For a small decal at ground level, an experienced store manager may be able to handle the job with the right preparation. For full storefront coverage, upper-level windows, oversized panels, or perforated graphics, professional installation is the smarter business decision. The cost of correcting a failed installation often exceeds the cost of doing it right the first time.
Start With the Right Graphic for the Window
Safety and performance begin before the installer touches the glass. Window graphics are not one-size-fits-all. A short-term sale decal, a frosted privacy film, a full-color vinyl panel, and one-way perforated window film require different materials and application methods.
Confirm whether the graphic is meant for interior or exterior application. Interior-mounted graphics are protected from weather and vandalism, while exterior graphics can offer stronger visibility in certain storefront conditions. The adhesive and print orientation must match the intended installation side. A reversed graphic placed on the inside of a window, for example, may look correct from outdoors but needs the proper clear material and ink protection.
Also consider how much visibility your business needs. Restaurants, doctor offices, retail stores, and laundromats may want privacy without making the space feel closed off. Perforated film can preserve some outward visibility, but it is not the best choice for every pane or every lighting condition. The right material protects your brand investment and helps avoid an unnecessary removal and replacement job.
Inspect the Glass and the Work Area First
Do not install over damaged, loose, or heavily contaminated glass. Check for chips, cracks, failed seals, peeling tint, old adhesive residue, and paint overspray. A graphic will not fix those issues. In fact, it can conceal a problem until removal becomes more difficult.
Look at the surrounding conditions, too. Is the window beside a busy entrance? Does the work require blocking part of a sidewalk, lobby, or service counter? Will doors be opening near the installer? Plan the installation for a slower period whenever possible, then set a clear work boundary with cones, caution tape, or signage. Customers should never need to walk under a ladder or around tools and backing paper.
For New York City storefronts, exterior access deserves extra attention. Busy sidewalks, tight setbacks, delivery traffic, and building rules can change the scope of the project quickly. If the work involves elevated windows, exterior access equipment, or a public walkway, confirm property-management requirements and applicable local rules before scheduling the installation.
Clean the Window Without Leaving Contamination Behind
Most application failures trace back to poor surface preparation. Dust, grease, silicone, fingerprints, and cleaning-product residue can keep adhesive from bonding evenly. A window that looks clean from a few feet away may still have enough contamination to cause lifting around the edges.
Start by removing old decals and adhesive with the correct scraper and removal solution. Use a new razor blade only on suitable flat glass, and keep it away from window film, coated surfaces, frames, seals, and plastic glazing. Scraping aggressively around an edge can scratch glass or damage adjacent finishes.
Next, clean the glass using a lint-free towel and a cleaner appropriate for the material. Pay close attention to corners and edges, where grime tends to collect. Finish with a final wipe so the surface is dry and free of fibers. Avoid using a towel that has been sitting on a dusty counter or has picked up oils from other jobs.
Temperature and humidity matter. Extreme cold can make vinyl less flexible, while direct heat can cause the adhesive to grab too quickly. Wind, rain, and airborne dust make exterior work harder to control. When conditions are outside the film manufacturer’s recommended range, rescheduling may be safer and more cost-effective than forcing the installation.
Use Safe Tools and a Controlled Application Method
A professional window-graphic setup is simple, but every tool has a purpose: a quality squeegee with a clean edge, application fluid when approved for the film, lint-free towels, measuring tools, masking tape, a sharp knife, and the right ladder or access equipment when needed. Dull blades tear vinyl and invite excess pressure. Dirty squeegees leave scratches and drag debris across the print.
Measure and level the graphic before removing the liner. For a large panel, create a hinged position with tape so the placement stays consistent. Never assume a window frame is perfectly square. A graphic that is level with the frame can still appear crooked if the mullion or surrounding architecture is off.
Use the application method recommended for that specific film. Some pressure-sensitive graphics are installed dry, while others allow a wet application that provides time to position the material. Do not improvise with excessive liquid, soap, or heat. The wrong technique can weaken adhesion, trap moisture, distort perforated film, or leave a finish that fails early.
Apply in controlled strokes from the center outward, using steady pressure to push air and application fluid toward the edges. Large graphics should be handled by at least two trained people. One person trying to control a wide panel can crease the material, lose alignment, or step backward into a customer path while focusing on the glass.
Keep Ladders, Knives, and Heat Tools Under Control
When people ask how to install window graphics safely, they often focus on the vinyl and overlook the actual hazards: working at height, cutting material, and managing heat. These risks deserve a clear plan.
Use a ladder only on stable, level ground, and select a height that lets the installer work without overreaching. Keep three points of contact while climbing, and never stand on the top cap or a step not designed for standing. A second person should stabilize the work area and keep pedestrians away, but they should not be treated as a substitute for proper ladder placement.
Keep utility knives retracted whenever they are not actively in use. Cut away from hands, glass edges, and finished surfaces. When trimming a graphic, use light passes instead of forcing a deep cut. Cutting too hard can score the glass, slice a gasket, or damage a window seal.
Heat guns can help conform certain films or set edges, but they can also warp vinyl, damage seals, and burn skin if used carelessly. Use the lowest effective heat setting, keep the gun moving, and follow the manufacturer’s guidance. A heat gun is not a shortcut for hiding wrinkles caused by poor placement.
Finish the Job With a Quality and Safety Check
Before reopening the area, inspect the graphic from both inside and outside. Look for bubbles, lifted edges, wrinkles, alignment issues, trapped debris, and incomplete trimming. Small bubbles may dissipate as some films cure, but large air pockets, creases, and edge lifting should be addressed immediately.
Allow the graphic to cure before heavy cleaning or repeated contact. Give staff clear instructions on maintenance. Abrasive pads, harsh solvents, and aggressive scraping can shorten the life of the installation. For door graphics, check that the design does not interfere with required visibility markings, operating hardware, or safety notices.
Dispose of backing paper, blades, old graphics, and adhesive waste before the crew leaves. A polished storefront should not come with a littered sidewalk, sharp blade hazard, or adhesive scraps stuck to the entryway.
A strong window graphic should look intentional from the street and perform reliably day after day. If your project involves large-format graphics, difficult access, multiple locations, or a high-visibility storefront, bring in an installation team that can manage the details. 10X Sign Company helps NYC-area businesses move from design through professional production and installation, so your windows make the right first impression without putting your property, staff, or customers at risk.